Tuesday, December 31, 2013

December 31-Marinara Vegetables

Happy New Year! 

Tonight I was feeling a little weighed down from a week of Christmas cookies, peanut butter bars, assorted cheeses, candied nuts, chocolates, cheesecakes, and more cookies. It's been a tasty month, but has left me feeling a little sluggish. 

In honor of fresh beginnings and the start of a new year, I came up with this light and healthy pasta alternative. Enjoy!


Marinara Vegetables
Assorted vegetables (I used snap peas, broccoli, baby carrots, spinach, and an onion)
Your favorite pasta sauce
Mozzarella cheese
Parmesan cheese crumbles and crushed red pepper 

1. Boil vegetables until cooked through. If using spinach, wait to add spinach to the pot until the vegetables are just about done. Drain water.
2. Add pasta sauce and stir to coat vegetables.
3. Add chopped mozzarella cheese. Stir to melt.
4. Serve topped with parmesan and crushed red pepper, if desired. 


December 25-Our Christmas Celebration (and pork posole!)

I love Christmas traditions! Decorating Christmas cookies, searching the neighborhood for the best light displays, watching corny television specials, attending the candlelight service at church, and gathering as a family for Christmas dinner. 

A few years ago I spent Christmas with my husband and his family for the first time. I loved catching a glimpse of his childhood memories and experiencing his family traditions. I also enjoyed tasting posole for the first time. Yum!

After we were married, Hubby and I started to discuss what our traditions would be as a new family. We've established a few of our own, including the adoption of pork posole at Christmas dinner. This year we hosted a Christmas gathering at our home, and introduced my family to this delicious tradition. 


 Pork Posole
2 pork butts
6lb can Hominy 
1 pkg New Mexico Red Powder Chili (do not need the entire pkg)
2 pkg menudo mix
Diced onion
Chopped cilantro
Lemon wedges

1. Boil pork for 45 minutes. Remove from pot, remove fat, and cut in half for faster cooking. Return to pot. Boil for an additional 45 minutes or until cooked through. Remove pork and shred.
2. Drain half the broth. Replace with half water. Bring to a boil.
3. Add shredded pork and hominy (rinsed) into the pot. 
4. Heat oil in a frying pan. Fry 1 large spoon of chili until browned, but not burnt. 
5. Pour chili into the pot a little at a time. Add menudo mix, leaving some left to use later as a topping. 
6. Serve with corn tortillas, onion, cilantro, and lemon.

Wednesday, December 11, 2013

December 11- Chicken and Spinach Macaroni and "Cheese"

As the winter months arrive, so do my cravings for comfort food. 
Nothing warms you up on a cold winter's night like a warm bowl of pasta. As a lactose-intolerant, health-conscious gal I typically avoid most comfort foods with the exception of an occasional indulgence. However, not all comfort foods deserve to be avoided! Tonight I whipped up this delicious macaroni dish that was high-protein, high-fiber, and even used dairy-free cheese!

My taste buds were in heaven. I will definitely be making this again.

*Please note, this recipe is not 100% dairy-free. It does contain 1/2 cup of Greek yogurt. If you can stomach dairy in small doses, it is a good compromise!


Chicken and Spinach Macaroni and "Cheese"
2 cups uncooked whole-wheat elbow pasta
1/2 cup Greek yogurt
2-3 cups fresh baby spinach
1/4 tsp garlic powder
1/4 tsp onion powder
salt and pepper
1 cup diced chicken, cooked (Optional)

1. Cook pasta as directed. 
2. Save about 1/2 cup of the pasta water. Next, place the spinach into a colander and drain the pasta. This will wilt the spinach. Return the pasta and spinach to the pot.
3. Add pasta water and cheese. Stir until the cheese is melted. 
5. Add yogurt, garlic powder, onion powder, salt and pepper (to taste), and chicken and stir through.
6. Enjoy!

Thursday, November 28, 2013

November 28-Thanksgiving Dinner

Today marked a major milestone: I hosted my first Thanksgiving! 

Chris and I have always wanted to host a holiday, but we had always lived in an apartment up until this year. We love to entertain and excitedly offered to host Thanksgiving as soon as we moved into our new home. What a wonderful day it was! Our home was filled with both sides of our family, plenty of laughter, and lots of love. 

Even though I've become pretty comfortable in the kitchen over the last few years, Thanksgiving dinner seemed a little intimidating. This meal would mark a defining moment for me as a woman! (Okay, so maybe that's somewhat dramatic, but it IS important!) The task was daunting but I was eager to face the challenge. I also knew I could count on my mom to be a great coach. She came over last night to walk me through the washing, de-throating, turkey-prepping process. 

The day was a success! 


I've made this dip for two years in a row and there are NEVER any leftovers. 

Pumpkin Dip
15oz can of pumpkin
5oz box instant vanilla pudding (Just the mix, do not make the pudding. Can sub sugar-free and/or fat-free)
16oz Cool Whip
2 tsp pumpkin pie spice
2 tsp cinnamon

1. Mix pumpkin, pudding mix, Cool Whip, and pumpkin pie spice together by hand in a large bowl. 2. Sprinkle with cinnamon. 
3. Chill for several hours before serving.
4. Serve with apple slices, vanilla wafers, or pretzels.


Roasting a turkey for the first time can be intimidating. It is a lot of work, but it really is not too hard if you know what to do! Here are a few tips from a fellow first-timer!

Turkey Tips for First-Timers

1. Be sure that your turkey is fully thawed. 
It can take a few days for a large bird, so be sure to plan ahead.

2. There is a neck, liver, giblets, and a few others surprises inside your turkey. 
Remove them before you stuff your turkey. 

3. Clean your bird and pat it dry. I did this the night before and it helped save time for the morning. 

4. Make your stuffing the night before, but do not stuff the turkey until you are ready to bake it. 

5. Be sure to plan ahead for the time it will take to cook your bird. My turkey was 20lbs and needed 6-7 hours to cook. We ate an early meal, which meant that the bird needed to go in the oven around 4:30am. This meant setting the alarm for 3:45am, to give me enough time to stuff the turkey.

6. Ever wanted to be a surgeon? Here's your chance. Stuff both ends of the turkey and sew him up!

7. Cover with foil and bake.

8. Go back to bed, Sleepy Head. 


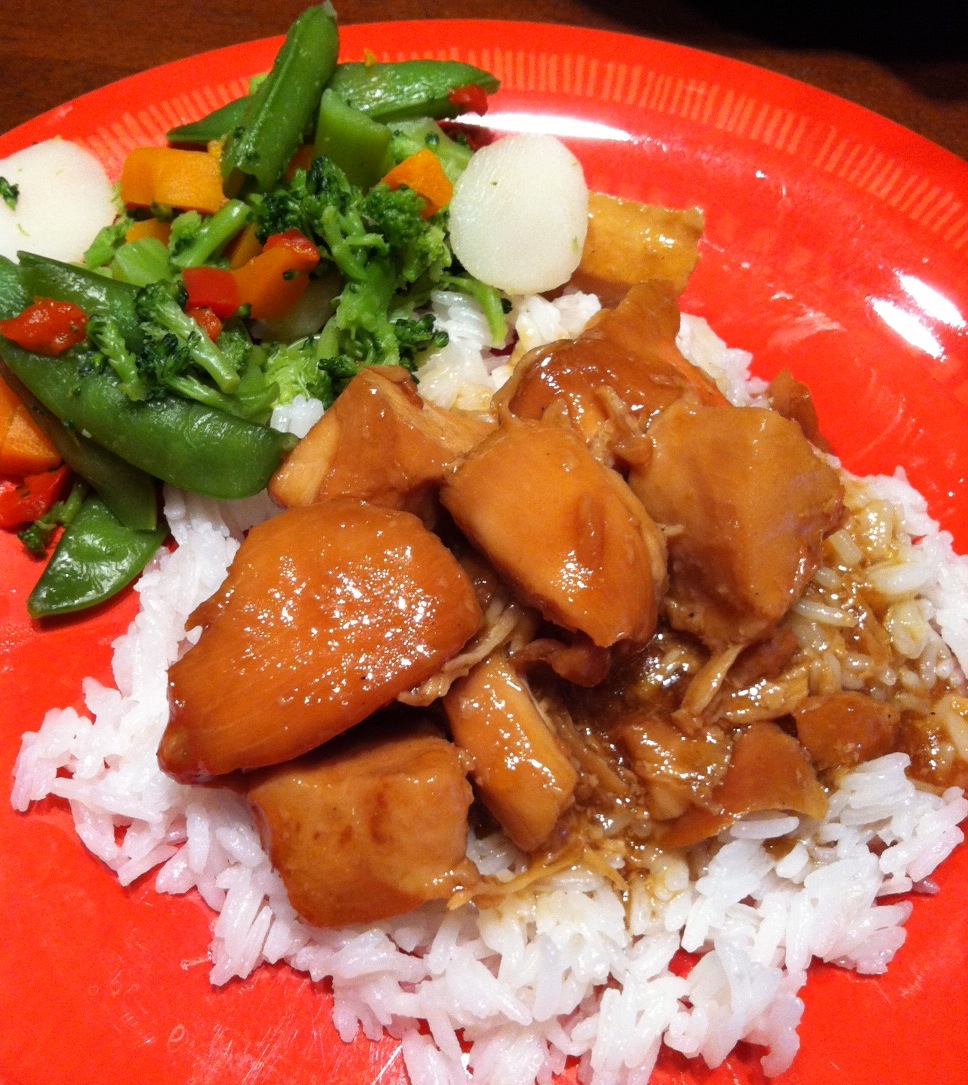
We feasted. Rolls, corn, yams, cranberry sauce, jello salad, creamy mashed potatoes (You don't really want to know what's in them, but here's the recipe. You won't be sorry.), green bean casserole, smoked ham, stuffing, and turkey.


Today was wonderful. I'm so thankful for our families, our home, and for God's faithfulness. 

Happy Thanksgiving to you and yours!


Wednesday, November 13, 2013

November 13-Make Ahead Meal #3: Crockpot Pepper Steak/Cheesesteak Flatbread Sandwiches

Although adjusting to a longer commute can be a challenge, discovering new make-ahead meals can be pretty fun! There is nothing like coming home to a home cooked meal simmering in the crockpot. Yum.

Crockpot Pepper Steak
Original Recipe from MJWAGNER68 at Allrecipes.com
1.5-2lbs beef sirloin, cut into 2-inch strips
Garlic powder
3 tbsp vegetable or olive oil
1 cube beef bouillon
1/4 cup hot water
1 tbsp cornstarch
1/2 cup chopped onion or 2 tbsp dried onion
2 large bell peppers, chopped
1 14.5oz can stewed tomatoes, with liquid
3 tbsp soy sauce
1 tsp white sugar
1 tsp salt


The night before (or the morning of):

1. In large skillet, heat oil and brown the beef strips. Sprinkle with garlic powder to taste. Transfer meat to slow cooker.
2. Mix bouillon cube with hot water until dissolved. Next, mix cornstarch until dissolved. Pour into slow cooker with meat. Stir in onion, peppers, tomatoes, soy sauce, sugar, and salt.
3. Cover and refrigerate until ready to cook (I recommend cooking within 24 hours of prep).


The day of: 

Cover and cook on High 3-4 hours or on Low 6-8 hours.


Cheesesteak Flatbread 
This pepper steak works great as sandwich filling! Toast two flatbread rounds. Using a slotted spoon to eliminate juice, placed a scoop of the steak and pepper mixture on top of one half. Top with mozzarella cheese and place other half of the flatbread on top to create a sandwich. Enjoy!

*Original recipe suggests serving the pepper stead over rice or noodles, which would pair very nicely with this dish!

Thursday, November 7, 2013

Make-Ahead Meal #2: Turkey Burgers

For my husband's birthday, I bought him a grill as a gift. He was thrilled! (Let's be honest; I was pretty excited myself! Hooray for barbecue!) He was dying to fire up the grill this week, so I gladly whipped up some of my famous (at least in our family) turkey burgers! These little guys work great as a make-ahead option. The recipe can be found in one of my previous posts: Savory Turkey Burgers.

Make-Ahead Meal #2

Sunday Night: Prepare patties as directed. We were planning to grill the burgers on Monday, so I did not bother freezing them. I simply covered them tightly and placed them in the refrigerator. If eating at a later date, you could seal the patties tightly and freeze them. 


Monday Night: Grill up the burgers and toast your buns! 
While hubby was grilling, I whipped up a small batch of Homemade French Fries and Zucchini Fries


Tuesday, October 29, 2013

October 28-Make-Ahead Meal #1: Broccoli Chicken Divan

Kristin's new mission: To become the master of make-ahead meals

Along with my awesome new kitchen, I've also gained a longer commute to work. Although I have less time in the evenings than usual, I am determined not to let this hinder me from dishing up delicious dinners throughout the week.

In a world of Pinterest-enthusiasts, bloggers, and online recipe databases, there exists a surplus of simple recipes that you can prepare in advance, freeze for later, and cook at your convenience.

To kickoff this new endeavor, I turned to a classic favorite. I originally posted this recipe for Broccoli Chicken Divan earlier this year and discovered that it works great as a make-ahead option.

Make-Ahead Meal #1
Sunday night: Prepare recipe as directed and cover. Since I was planning to bake this particular recipe the following evening, I simply sealed the dish and placed it in the refrigerator. If cooking at a later date, you could seal the dish and freeze it for the week.

Tip: Place a sticky note on the prepared recipe to remind yourself (or helpful husbands!) of your next steps, without having to refer to the cookbook.

Monday night: Bake recipe according to directions. If you are using a casserole dish, I recommend placing the entire thing into the oven before preheating so that the dish does not crack. Adjust cooking time if needed. Prepare sides (in this case, brown rice) and enjoy!

Help wanted!
Know of any great make-ahead meals? Let me know some of your favorites! I'd love to try them out!

Wednesday, October 23, 2013

Big News!

In my last post, I promised that I had a good reason for failing to blog over the last few weeks. In addition to my hectic schedule, my husband and I faced an exciting new endeavor...

We bought a house! 

This little Kitchen-ista has been promoted from a one-bedroom shoebox to countertop heaven! We give thanks for God for providing us with this home, along with the smoothest escrow we could have asked for! I look forward to the laugher, memories, and new recipes that are yet to come from the kitchen. 

Cheers to many new recipes to come!


Tasty Travels

Hello Blogosphere, it's your old friend Kristin! Remember me?
I know it seems like I've abandoned you and I am incredibly sorry. I promise I had a good reason.
(A really good reason...Exciting news to come in my next post!)

Part of my absence was due to job-related travel, which whisks me away each autumn on a series of travel adventures. Although I miss the kitchen at times like these, I sure do enjoy the opportunities it provides to discover tasty eating establishments across the country.

Last year I documented my Top Travel Meals of 2012. I now bring you, the delicious discoveries of 2013.

3. Which Wich
http://www.whichwich.com  
Multiple locations
 Remember when Mom used to send you to school with a made-with-love turkey sammie in a brown paper bag? This place brings you back to those carefree days, except you call the shots. This build-your-own sandwich shop was my favorite lunch shop when I was on the road. When you enter the restaurant, you grab a paper bag and select the meats, toppings, breads, etc. that you want. Next, you hand the bag to the wonderful sandwich-creators and they build your hoagie (with love) right before your eyes. I've been craving this place ever since I got home. Delish.

2. Justin's Organic Peanut Butter Cups
http://www.justins.com 
This is definitely not a meal, but it was my favorite late-night snack on the road. It was included in a thank-you basket that I received at a meeting and I found it at the bottom of my purse one evening, just a chocolate craving struck. It was so incredible that I couldn't resist sharing.

3. Beaujo's Pizza
Denver, CO
http://www.beaujos.com
 
This place focusses on deep-dish pizza, but I was delighted by the wonderful alternative options that this little gem offers! I met up with an old family friend one afternoon while in Denver, and she suggested that we meet at Beaujo's. I was thrilled to see both gluten-free and dairy-free options on the menu! I built my own pizza with gluten-free crust and dairy-free cheese, topped with grilled chicken and spinach. It was delicious!


Saturday, September 14, 2013

September 14- A Clean (Eating) Start-Garden Frittata and Banana Pancakes

I am blessed to still be close with my high school girlfriends. Through the years we've attended different colleges, each met our husbands, started new careers, and have lived in different cities, yet somehow we've not only remained good friends but have grown even closer with age. (Our husbands hit it off and actually like to hang out with each other too...What more could you ask for?)

Despite the distance and crazy schedules, we try really hard to meet up a few times a year to catch up and do something fun. This weekend we had an old-fashioned sleepover at my friend Turell's house while her husband was away. (Complete with ice cream, chick-flick television, and giggles. You're never too old.)

This morning we started the day off right with a delicious, healthy clean-eating breakfast.  So good!

These recipes come from the kitchen of Miss Turell Lynn, blogged with permission. 


Garden Frittata
Tomatoes, diced
Onions, diced
Spinach
Eggs (Today we used 8 egg whites and 2 full eggs, which made about 4-6 servings)
Cheese (optional)

1. Saute tomatoes and onions in a nonstick skillet. Toward the end, add spinach to wilt.
2. Whisk eggs and egg whites in a bowl and pour half of the mixture into a nonstick baking dish.
3. Add the vegetables (and cheese if desired) to the pan and add the rest of the egg mixture.
4. Bake on 350 about 15-20 minutes.

Simply Banana Pancakes
Bananas
Eggs
(1 banana, per every two eggs.)

1. Blend bananas and eggs in a food processor or blender until smooth.
2. Pour mixture in small batches onto a griddle or skillet, coated with cooking spray. Cook as you would pancakes, flipping when the bottom side is almost done.


Bon appetite!

Thursday, September 5, 2013

September 4-A Middle Eastern Celebration

I've mentioned many times how much my husband and I LOVE Middle Eastern cuisine. There is a Middle Eastern Market about 15 minutes from us that we like to visit to stock up on a few essentials. It's always worth going out of our way for quality olive oil, tahini, fresh pita, and authentic seasonings.

Last weekend we were inspired to test our ability to make our favorite cuisine at home and dined on this miniature feast of chicken shwarma, homemade hummus, rice, and fresh pita bread. The hummus was amazing and the rice turned out great. My shwarma was yummy but a far cry from authentic. The seasoning was a little different than I expected...Good for a first attempt!


Our Mini M.E. Feast

Chicken Shwarma: Chicken, tomatoes, and onion marinated with Sadaf Shwarma Seasoning

Hummus: Our recipe from April 2013

Rice: I prepared white rice as directed, but added a little bit of garlic, cumin, and parsley to spice it up.

Pita Bread: Fresh baked Arabic Bread from the local market

Tuesday, August 27, 2013

August 27-Slow-Cooker Latin Chicken with Black Beans and Sweet Potatoes

There is something wonderful about cooking from a cookbook. Don't get me wrong, the internet is fantastic, but lately I've been inspired to break into my cookbook collection that has been collecting dust above the kitchen cupboards.

The first cookbook I ever purchased was "Fast Weeknight Favorites" by Good Housekeeping. I had just set out on my kitchen-venture and figured that I couldn't go wrong with something that promised to not only be fast, but also turn into a family favorite. Tonight I rediscovered this collection of quick and easy suppers and found this tasty recipe. Another home run!


Slow-Cooker Latin Chicken with Black Beans and Sweet Potatoes
Recipe below contains a few slight adaptations; Original Recipe on Good Housekeeping
1.5-2 lbs boneless, skinless chicken tenders
2 tsp ground cumin
1/4 tsp salt
1/4 tsp black pepper
1 tsp smoked paprika
1/2 tsp ground allspice
3/4 cup reduced-sodium chicken broth
1/2 cup salsa
3 large garlic cloves, crushed
1 can black beans, drained
1.5 lbs sweet potatoes, peeled and cut into chunks
1 small jar roasted red pimento peppers
1/3 cup cilantro leaves, chopped
lime wedges

1. Sprinkle chicken with 1/2 tsp cumin, salt, and pepper. Heat nonstick skillet over medium heat until hot. Add chicken and brown on all sides, about 10 minutes. Remove chicken to plate and remove skillet from heat.
2. In the same skillet, combine paprika, allspice, broth, salsa, garlic, and remaining 1.5 tsp cumin.
3. In a slow cooker, combine beans and sweet potatoes. Arrange chicken in a single layer on top of the potato mixture. Pour broth mixture on top. Cover slow cooker and cook 8 hours on low or 4 hours on high.
4. Remove chicken with tongs and place on a large platter. Gently stir roasted red pepper strips into potato mixture. Spoon mixture over chicken. Sprinkle with cilantro and serve with lime wedges.
5. Enjoy!


Friday, August 23, 2013

August 23- Bean and Chicken Sausage Stew

I had no intentions of cooking tonight. As much as I love the kitchen, this week called for a night of vegging at home with a box of Thai takeout, watching TLC specials. 

My plans changed when I found this easy recipe in Real Simple's "Quick and Easy Meals" mini cookbook. The directions promised that it would only take 15 minutes to prep and cook...I figured it couldn't get any easier than that. 

Let's be real. I'd much rather cook that eat out anyway (Seriously. My hubby will vouch for me.).

I am in love with this stew recipe! I usually don't like sausage (something about the texture I think) but this sure hit the spot. This is not the last time I'll be making this!


Bean and Chicken Sausage Stew
Recipe by Real Simple
1 tbsp olive oil
1 13oz package chicken sausage links (fully cooked) thinly sliced
2 cloves garlic, thinly sliced
1 19oz can cannellini beans, drained and rinse
1 14.5oz can low-sodium chicken broth
1 14.5oz can diced tomatoes
1 bunch kale
Kosher salt and pepper
Crusty bread (optional). I served this stew with Nabisco Triscuit crackers.

1. Heat oil in a large saucepan over medium heat. Add sausage and cook, without turning, until browned, about 3 minutes. Turn, add garlic, and cook 2 minutes more.
2. Add the beans, both, and tomatoes and their liquid. Bring to a simmer and cook over medium-high heat.
3. Meanwhile, cut out the tough stems and center ribs from the kale leaves and discard. Tear the leaves into large pieces. Add the kale to the pan and cook, stirring occasionally, until wilted, 2-3 minutes.
4. Season with 1/4tsp each salt and pepper.
5. Serve with bread (or crackers) if desired.


Wednesday, August 14, 2013

August 14- Banana Mocha Oatmeal

Despite the plethora of dinner recipes on this blog, breakfast is my favorite meal of the day.
I love breakfast. I mean really, truly love it. 

If I had to choose between two scenarios: 
A. Sleep in an extra 30 minutes in my cozy bed...
OR 
B. Spend that 30 minutes enjoying a delicious breakfast while catching up on the news...
 I'd pick B. Hands down. 

Old-fashioned oatmeal is my breakfast of choice. It's warm, filling, healthy, and you can dress it up however you like. Below is one of my favorite, filling, post-workout friendly oatmeal combos. Enjoy!
Banana Mocha Oatmeal
1/2 cup old-fashioned oats
1/2 scoop chocolate protein powder
1/4 large banana, mashed
1 spoon instant coffee
cocoa-roast almonds, crushed (amount as desired)

1. Mix oats, protein powder, and instant coffee in a bowl. Add 1-1.5 cups water, depending on desired consistency.
2. Microwave oatmeal as directed.
3. When 30 seconds cooking time remains, remove oatmeal from microwave and add mashed banana and almonds. Mix thoroughly.
4. Continue cooking additional 30 seconds.
5. Enjoy and be filled with goodness. 

Monday, August 12, 2013

August 12-Pizza Bites & Zucchini Fries

I have a love-hate relationship with the month of August. It's always a crazy, busy, roller-coaster of a month for me, yet at the same time it's a beautiful, warm, fantastic farewell to summer. While planning this week's menu, I wanted something simple that both my husband and I would enjoy. I came up with these tasty pizza bites, drawing inspiration off my mom's delicious recipe for Chicken Crescent Rolls

My husband loved them, which for me is the best gage of success. I made two varieties to satisfy each of our palettes. Delicious!

For a side, I made Zucchini Fries. These were the highlight for me! I ate about half the batch and would have been happy just eating these. So yummy.


Kristin's Pizza Bites
1 8 oz can crescent rolls
2-3 tbsp melted margarine
1/3 cup bread crumbs
pasta sauce
pizza fillings (see below for suggestions)
His: Shredded Italian cheese blend, black olives, pepperoni
Hers: Veggie cheese, diced chicken, black olives, and diced red onions

1. Preheat oven to 375.
2. Separate crescent rolls on a baking sheet, coated with nonstick spray. 
3. Place desired fillings (cheese, toppings, etc) in a bowl. Add enough pasta sauce to coat ingredients and stir through. I recommend starting with small dollop of sauce and add more as needed. You do not want the filling to be too saucy, or the liquid will seep through the rolls. 
4. Place a small amount of mixture into the center of each triangle. Starting at the small end of the triangle, roll to the opposite point. Tuck in the sides to seal completely.
5. Dip each roll in melted margarine and roll in bread crumbs. If the rolls are flimsy and you are afraid of them falling apart, you can also spread butter on top and sprinkle with bread crumbs. 
6. Bake 25-30 minutes or until rolls are golden brown. 
7. In a small sauce pan, heat the extra pasta sauce. 
8. Enjoy the rolls, dipped in pasta sauce. 

Zucchini Fries by Health Magazine
2-3 zucchini
1 egg white
1/4 cup milk
1/2 cup shredded parmesan cheese (I only used 1/4 cup)
1/2 cup bread crumbs

1. Preheat oven to 425.
2. Cut zucchini into 3-inch strips.
3. In one bowl, whisk egg whites and add milk. In another bowl, combine parmesan and bread crumbs.
4. Dip each zucchini stick into the egg mixture and roll in the crumb/parmesan mixture.
5. Spray baking sheet with cooking spray. Lay zucchini on sheet and bake for 25-30 minutes.
6. Serve with ranch dressing and/or marinara for dipping. 


Tuesday, August 6, 2013

August 6-Mediterranean Baked Chicken

Whenever I need inspiration, I turn to Pinterest. This week while contemplating what to make for dinner, I found this recipe by The Clever Carrot. 

The flavor in this dish is phenomenal! I savored every bite. Thanks for the inspiration!


Mediterranean Baked Chicken
1.5 lbs boneless, skinless chicken breasts
2 garlic cloves, thinly sliced
1 14oz jar marinated artichoke hearts, reserving 2-3 tbsp of marinade for later
4 sprigs of fresh oregano, leaves stripped (I used dried oregano)
2 small red onions, thinly sliced
1 pint cherry tomatoes, left whole
1 14oz can white beans, drained and rinsed
1/2 cup Kalamata olives, pitted
1 small tub marinated bocconcini (I couldn't find bocconcini at my local supermarket, so I substituted this for 6oz fresh mozzarella cheese)
olive oil
salt & pepper
basil & parsley

1. Drain the artichoke hearts, reserving about 2-3 tbsp juice in a small bowl or gallon ziplock bag. Set artichokes aside. In the bowl, combine garlic and oregano leaves. Cut chicken into 1 1/2 inch strips and add to the marinade. Mix well to coat. The original recipe suggests marinating the chicken for 1 hour minimum, 3 hours maximum. My chicken marinated all day while I was at work and it still turned out great.
2. Preheat oven to 400. In a large roasting pan, add sliced onions and tomatoes. Toss with olive oil and season with salt and pepper. Bake until onions are soft and tomatoes begin to burst, about 15-20 minutes.
3. Meanwhile, in a large skillet heat 1 tsp of olive oil over moderate heat. Brown the chicken on both sides, working in batches. The chicken will be a little undercooked.
4. Remove the roasting pan from the oven. The onions should be somewhat soft. If not, bake additional 5 minutes.
5. Add chicken, artichoke hearts, beans, and olives to the pan. Roast about 5-7 minutes or until chicken is done. 
6. Remove from oven. Sprinkle with basil, parsley, and cheese. 


Saturday, August 3, 2013

August 3- Chocolate Cupcakes w/Gooey Rolo Centers

There is no woman that I admire more than my mom. People always told me that I'm just like her. As a teen I wasn't sure how I felt about that, but as I grow older I realize it is one of the best compliments I could receive. 

Tomorrow the entire family will be gathering together to celebrate my parent's birthdays, as both of their birthdays fall in the same week. I called my mom earlier this week to ask if what I could contribute to the birthday luncheon. She assured me that most everything was taken care of and that she had it all under control (I am my mother's daughter).  I insisted that she should not make her own birthday cake. She told me that the cake was covered; She would be making my dad's favorite cherry-vanilla dessert. 

I have no complaints about this (that is MY favorite dessert too, after all), but I know that my mom is a triple-chocolate-chocolate lover when it comes to desserts. After I had hung up the phone, I decided to make something chocolate to bring to the birthday celebration. 

Besides, who would complain about double desserts?

My mom loves Chocolate Turtle Candies; The ones with the nuts and caramel with the chocolate coating. Inspired by her favorite treat, I set out to create a nutty-chocolate-caramel cupcake.

It's quite simple.
Follow your favorite recipe for chocolate cupcakes.
Before baking, place one Rolo candy into the center of each cup and smooth batter to cover.
Bake...Cool....Frost.
Top with crushed nuts.


August 3- Fiesta Chicken Flatbread

One of the reasons I love cooking so much is because it allows me to be creative and to tweak recipes to meet my tastes, cravings, and even my dietary restrictions. A few days ago, this lactose-intolerant gal was craving pizza. I looked through my refrigerator, collected ingredients I already had on hand, and whipped up this delicious lunch. 

I've eaten this four times this week, including today. So yummy!


Kristin's Fiesta Chicken Flatbread
1 Flatout Flatbread (flavor of your choice)
1 slice Go Veggie! Alternative Slices Pepper Jack Flavor, broken into pieces
1/2 cup cooked chicken, cut into chunks
1/4 avocado, cut into small pieces
salsa (about 4 tbsp)
Optional veggies (any odds and end you may have in your kitchen- minced garlic, chopped onion, chopped zucchini, chopped snap peas, chopped broccoli...they're all great additions!)

1. Preheat oven to 350.
2. Lay flatbread on a baking sheet and top with salsa. Spread salsa evenly so that entire surface is covered.
3. Sprinkle remaining ingredients evenly over the surface.
4. Bake 15-20 minutes.


July 28-Shrimp Fajitas

On Sunday night, my husband and I were wiped after a full day of church activities and a trip to the Orange County Fair. We weren't really hungry until later in the evening, thanks to the variety of deep-fried-oddities at the fair. Once we realized we were both hungry, we scrounged through our kitchen for options. 
Frozen dinners? Top ramen?....Mmm, what about shrimp fajitas?

I had a few bell peppers and an onion in the fridge, as well as frozen cooked shrimp in the freezer. Thirty minutes later we had ourselves a pretty tasty meal!


Shrimp Fajitas
1/2-3/4 lb cooked shrimp
1-2 bell peppers, cut into chunks
1 onion, cut into chunks
1 tbsp olive oil
fajita seasonings (pre-mixed or homemade with spices you probably have on hand)
1. In a large skillet heat oil. Sauté vegetables until crisp. 
2. Add shrimp, fajita seasonings, and a little water to help seasoning coat. Heat through.
3. Serve with rice and/or tortillas.

Thursday, July 11, 2013

July 10-Salmon Baked in Foil & Oven Crisp Sweet Potatoes


Salmon Baked in Foil 
By Giada De Laurentiis
4 5oz salmon fillets
2 tsp + 2tbsp olive oil
salt & pepper
3 tomatoes, chopped
2 shallots, chopped
2 tbsp lemon juice
1 tsp dried oregano
1 tsp dried thyme
*I also added a small can of black olives, sliced.

1. Preheat oven to 400. Sprinkle salmon with 2 tsp oil, salt, and pepper.
2. In a medium bowl, toss tomatoes, shallots, olives, 2 tbsp oil, lemon juice, oregano, thyme, salt, and pepper.
3. Place salmon fillet oil side down atop a sheet of foil. Wrap the ends of the foil in a spiral shape. Spoon the tomato mixture over the salmon. Fold sides of the foil over the fish/tomato mixture, covering completely, to seal the packet closed. Place pack on a heavy baking sheet. Repeat for each fillet.
4. Bake until done, about 25 minutes.

Oven Crisp Sweet Potatoes
2-3 sweet potatoes, cut into thin slices
2 tbsp olive oil
1/2-1 tsp cayenne pepper (I used 1 tsp and 2 potatoes and the ratio made for pretty spicy spuds!)
salt & pepper

1. Toss all ingredients to coat potatoes.
2. Lay potatoes on a baking sheet and back on 400 for about 30-40 minutes, or until potatoes are crisp done.

Monday, July 1, 2013

July 1- Beef Sirloin Steak w/Baby Spinach

I married a carnivore.

 I usually don't eat much red meat, but I'm definitely willing to expand my horizons to feed my hungry hubby. I had been looking for ways to incoorporate beef into the dinner repetoire and stumbled across this gem. I'm really glad I found a beef recipe that both of us enjoy!

Thank you, Campbell's Kitchen for making dinner so easy and so delicious! 


Beef Sirloin Steak with Baby Spinach
Original recipe by Campbell's Kitchen
2 tbsp olive oil
1lb boneless beef sirloin steak (about 4 pieces)
1 large onion, sliced
1 red pepper, chopped
3 cloves garlic, minced
1 10.75oz can Cream of Mushroom Soup
1/2 cup water
2 tbsp balsamic vinegar
1 tbsp chopped fresh rosemary leaves (can also use 1 tsp dried rosemary, crushed)
1 bag fresh baby spinach

1. Heat 1tbsp oil in a skillet over medium-high heat. Add the beef and cook until well browned on both sides. Remove beef from skillet and drain any fat.
2.  Heat the remaining 1tbsp oil in the skillet. Add the onion and pepper and cook for 1 minute, stirring occasionally. Add the garlic and cook until vegetables are tender-crisp, stirring often.
3. Stir the soup, water, vinegar and rosemary in the skillet and heat to a boil. Return the beef to the skillet. Reduce the heat to medium. Stir in the spinach. Cover and cook for 2 minutes or until beef is desired doneness. Enjoy!

Campbell's suggests serving with mashed potatoes. We enjoyed ours with baked. Just a matter of preference, but I would say that potatoes complete the meal!

Wednesday, June 26, 2013

June 26-Crock Pot Teriyaki Chicken

The perfect meal for warm summer nights when you don't want to heat up your menu without heating up the entire kitchen.


Crock Pot Teriyaki Chicken
Adapted from the original recipe from Lake Lure Cottage Kitchen
2lb boneless, skinless chicken breasts cut into large chunks
2/3 cup sugar
2/3 cup soy sauce
4 tbsp apple cider vinegar
1/2 tsp ground ginger
1/2 tsp minced garlic
1/4 tsp pepper
3 1/2 tsp cornstarch
3 1/2 tsp cold water

1. Combine the sugar, soy sauce, vinegar, ginger, garlic, and pepper in a slow cooker. Add chicken and stir through so that chicken is coated. Cover and cook on low for  about 4 hours, or until chicken is cooked.
2. Transfer liquid to a sauce pan (It may help to remove the chicken and pour the liquid directly into the pan. Return chicken to slow cooker.) Bring liquid to a boil. Combine cornstarch and water until smooth. Gradually stir the mixture into the sauce until thickened.
3. Return sauce to pot and mix through.
4. Serve with Jasmine rice.

June 24-Spaghetti and Meatballs

A few months ago I made Turkey Meatball Subs for dinner and they were a hit. 
Earlier this week the recipe became even better when I discovered it could be used to make the family classic, spaghetti and meatballs. To make, follow the recipe for Turkey Meatball Subs and add an extra can of tomato sauce for bulk. Prepare noodles as directed and top with your meatball marinara mixture. Perfecto!

Tuesday, June 11, 2013

June 11-Baked Chicken Breasts Stuffed w/Pesto and Cheese

My husband called this recipe "fancy" and "upscale". Next, he continued to eat two servings. 
Although I couldn't fit quite as much into my tummy, I would have if I could and am looking forward to taking the rest to work tomorrow for lunch! I'd say that this recipe was a success!

Baked Chicken Breasts Stuffed with Pesto and Cheese
4 large boneless, skinless chicken breasts
4 tbsp basil pesto
2 tbsp sour cream
4 tbsp grated mozzarella cheese
2 large eggs, beaten
6 tbsp grated Parmesan cheese
6 tbsp bread crumbs

1. Preheat oven to 375. Spray a small casserole dish with non-stick spray. Wash chicken and trim any excess fat. Put chicken into a gallon ziplock bag (1-2 at a time) and pound with a meat mallet until the chicken is thin. 
2. In a small bowl, mix basic pesto, sour cream, and mozzarella. Spread a thin layer of this mixture over each chicken breast, leaving a little room around the edges so that the mixture doesn't run while cooking. Roll up the chicken breasts and secure with toothpicks if necessary.
3. Take two bowls: Put the beaten eggs in one and the Parmesan and bread crumbs in the other. Dip each rolled breast into the egg mixture and then into the crumb mixture, so that the chicken is completely coated.
4. Place chicken breasts into the casserole dish and bake until the chicken is cooked and lightly browned, about 30-35 minutes.
5. Serve hot and enjoy!